ROS2 Navigation 2 with Windows
Nav2 is the next generation ROS Navigation stack for ROS 2. This short guide shows you how to quickly get started with Navigation 2 on Windows.

Objectives
- Exercise the ROS 2 on Windows installation.
- Bootstrap an environment running Navigation 2 with Turtlebot.
Prerequisites
This walkthrough depends on having ROS 2 Foxy on Windows installed.
Create a Navigation 2 Workspace
Create a empty workspace to contain the Robotis Turtlebot3 Navigation2 sources. This is a quick walkthrough, a complete set of tutorials is available on the Robotis website.
:: create a empty workspace
mkdir c:\nav2_ws\src
pushd c:\nav2_ws

curl -o nav2.repos https://raw.githubusercontent.com/ms-iot/ROSOnWindows/master/docs/ros2/navigation2_foxy.repos
vcs import src < nav2.repos
Build and Activate the Navigation 2 Workspace
Build the workspace by colcon build tool.
:: change to the root of workspace
pushd c:\nav2_ws

:: build the workspace
colcon build
Activate the workspace which was built.
:: activate the workspace so that ROS can find your freshly built binaries.
install\setup.bat
One Time Setup
In order to "seed" your environment, you'll either need to create a navigation map, or use the following commands to download a pregenerated one:
curl -o c:\nav2_ws\map.pgm https://raw.githubusercontent.com/ROBOTIS-GIT/turtlebot3/master/turtlebot3_navigation/maps/map.pgm
curl -o c:\nav2_ws\map.yaml https://raw.githubusercontent.com/ROBOTIS-GIT/turtlebot3/master/turtlebot3_navigation/maps/map.yaml
Verify your environment with Gazebo and TurtleBot3
To run this walkthrough you will need two terminal windows with the ROS2 environment loaded.
In the both terminal windows, perform the following actions:
cd c:\nav2_ws
set GAZEBO_MODEL_PATH=C:\nav2_ws\install\turtlebot3_gazebo\share\turtlebot3_gazebo\models;%GAZEBO_MODEL_PATH%
set TURTLEBOT3_MODEL=waffle
Now in terminal window one, launch the simulation environment:
ros2 launch turtlebot3_gazebo turtlebot3_world.launch.py
In terminal window two, launch the navigation stack.
ros2 launch turtlebot3_navigation2 navigation2.launch.py map:=c:\nav2_ws\map.yaml
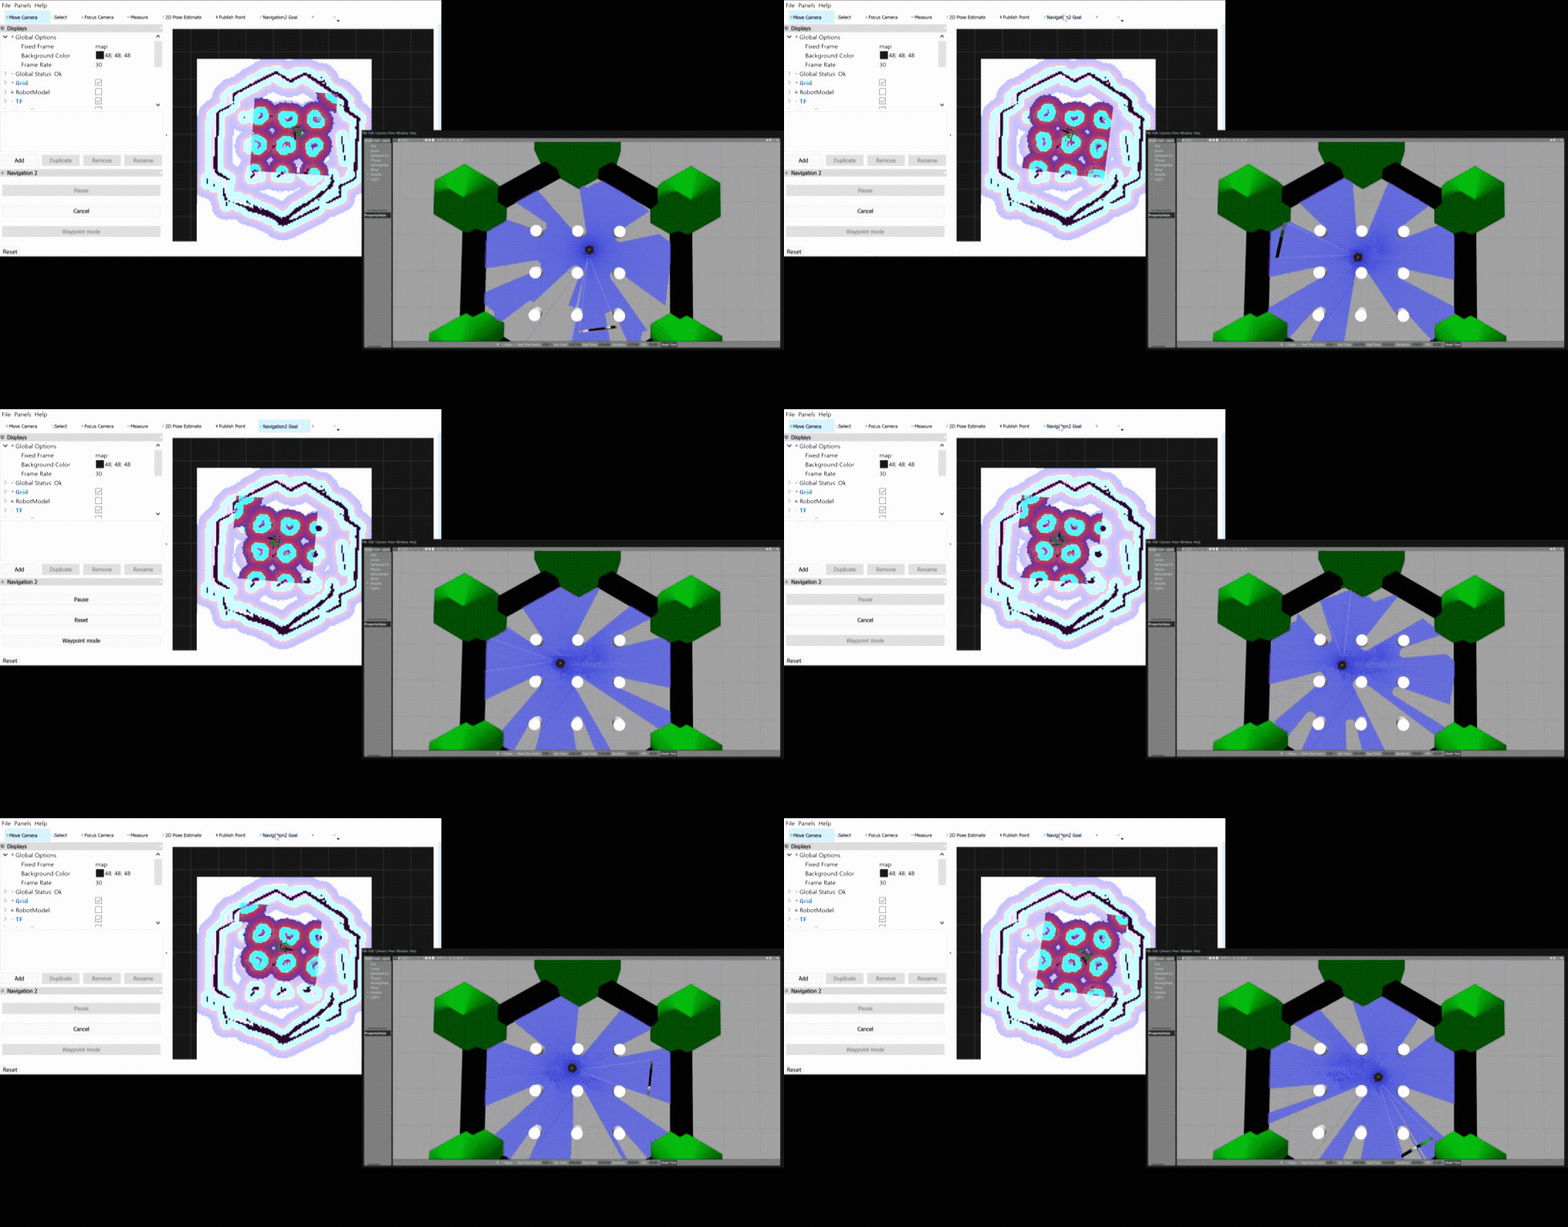
After a few moments, you should see TurtleBot3 in a simulation world and the respective map shows in RViz. You may notice many warnings in the terminal window, this is normal.
Before navigating the robot, you must set the initial pose of the robot:
- Select
2D pose estimatebutton in the toolbar ofRViz. - Align the cursor to where the Turtlebot appears in the map.
- Press the left mouse button without releasing, then drag in the direction the turtlebot is facing, then release the mouse button.
- You should now see the costmap displayed.
- You can now use the
Navigation2 goalbutton to set a goal. - Similar to setting the initial position, press the left button where you would like the robot to move to, then drag in the direction you'd like it to face when it completes.
- When you release the mouse button, the robot will navigate around obsticals.
Note: To shutdown Gazebo, please close the Window, otherwise the UI can hang requiring termination through the Windows task manager.
Explore Navigation 2 Samples
There are many Navigation 2 resources online. Here we share some good starting points:
Citation
This tutorial references Navigation2 for ROS2.
@InProceedings{macenski2020marathon2,
author = {Macenski, Steven and Martin, Francisco and White, Ruffin and Ginés Clavero, Jonatan},
title = {The Marathon 2: A Navigation System},
booktitle = {2020 IEEE/RSJ International Conference on Intelligent Robots and Systems (IROS)},
year = {2020}
}